
1.When using printer drives
①install drivee would like to use from below
※During settings, please connect to school Wi-Fi (SOKAWiFi,SOKAWiFi_bg)
How to install drivers
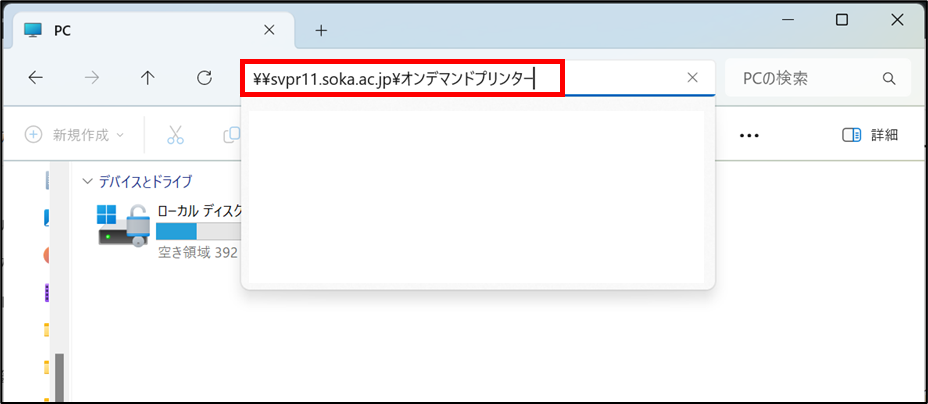
(1)Open explorer with pushing [Windows mark] +[E] on keyboard,
pasted the path would like to install for window and push enter .
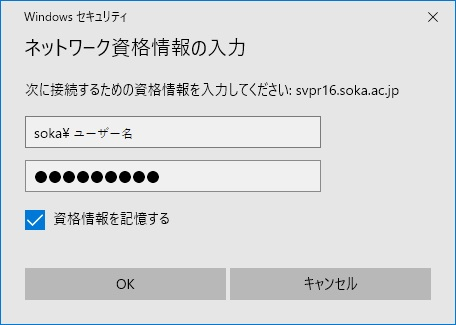
(2)When asked your network credentials, enter your user ID and password.
ID: soka\username
Password: password
*Please check “Remember my credentials”. Need not to enter this credentials next time.
→Click “OK”.
For using on-demand printer (with card reader)
\\svpr11.soka.ac.jp\オンデマンドプリンター
\\svpr12.soka.ac.jp\モノクロプリンター
Need to install Dedicated printer drivers for printers without card reader
For using without above
If the printer driver below contains the name of the classroom to use is written following list,
please install the corresponding printer driver.
\\svpr13.soka.ac.jp\E棟E307#1
\\svpr13.soka.ac.jp\E棟E307#2
\\svpr13.soka.ac.jp\E棟E307#3
\\svpr14.soka.ac.jp\M棟M1100図書館資料室
\\svpr14.soka.ac.jp\中央図書館1F閲覧室
\\svpr14.soka.ac.jp\創価女子短大3F図書室
②Completed to install, could select printer from “select printers” from Office etc…
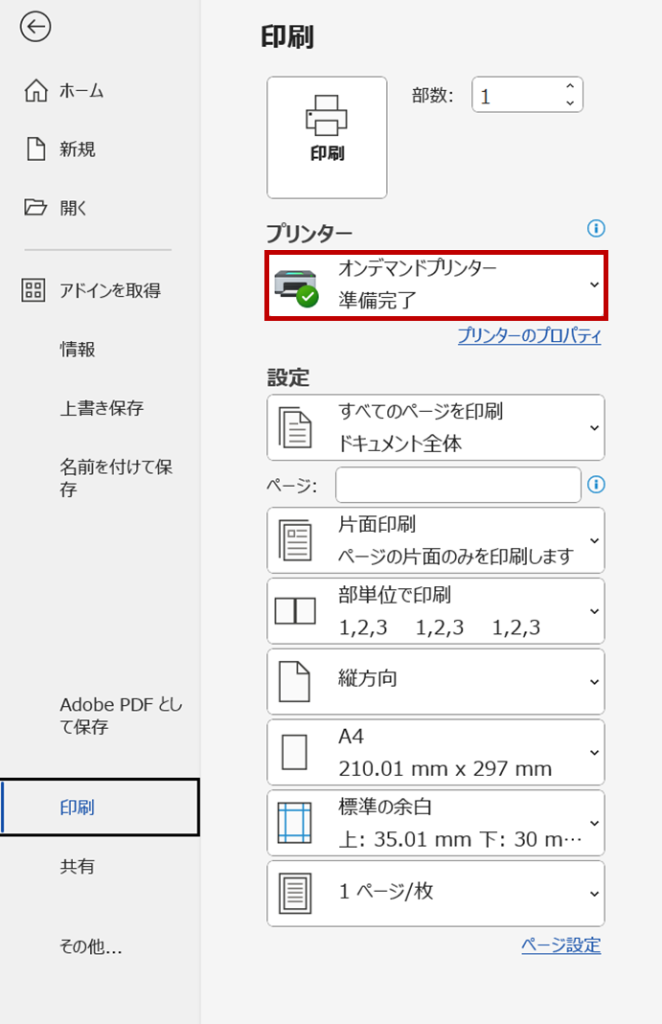
③Print ※Please confirm the details from “How to use on-demand Print“
2.How to use Web print
※During settings, please connect to school Wi-Fi (SOKAWiFi,SOKAWiFi_bg)
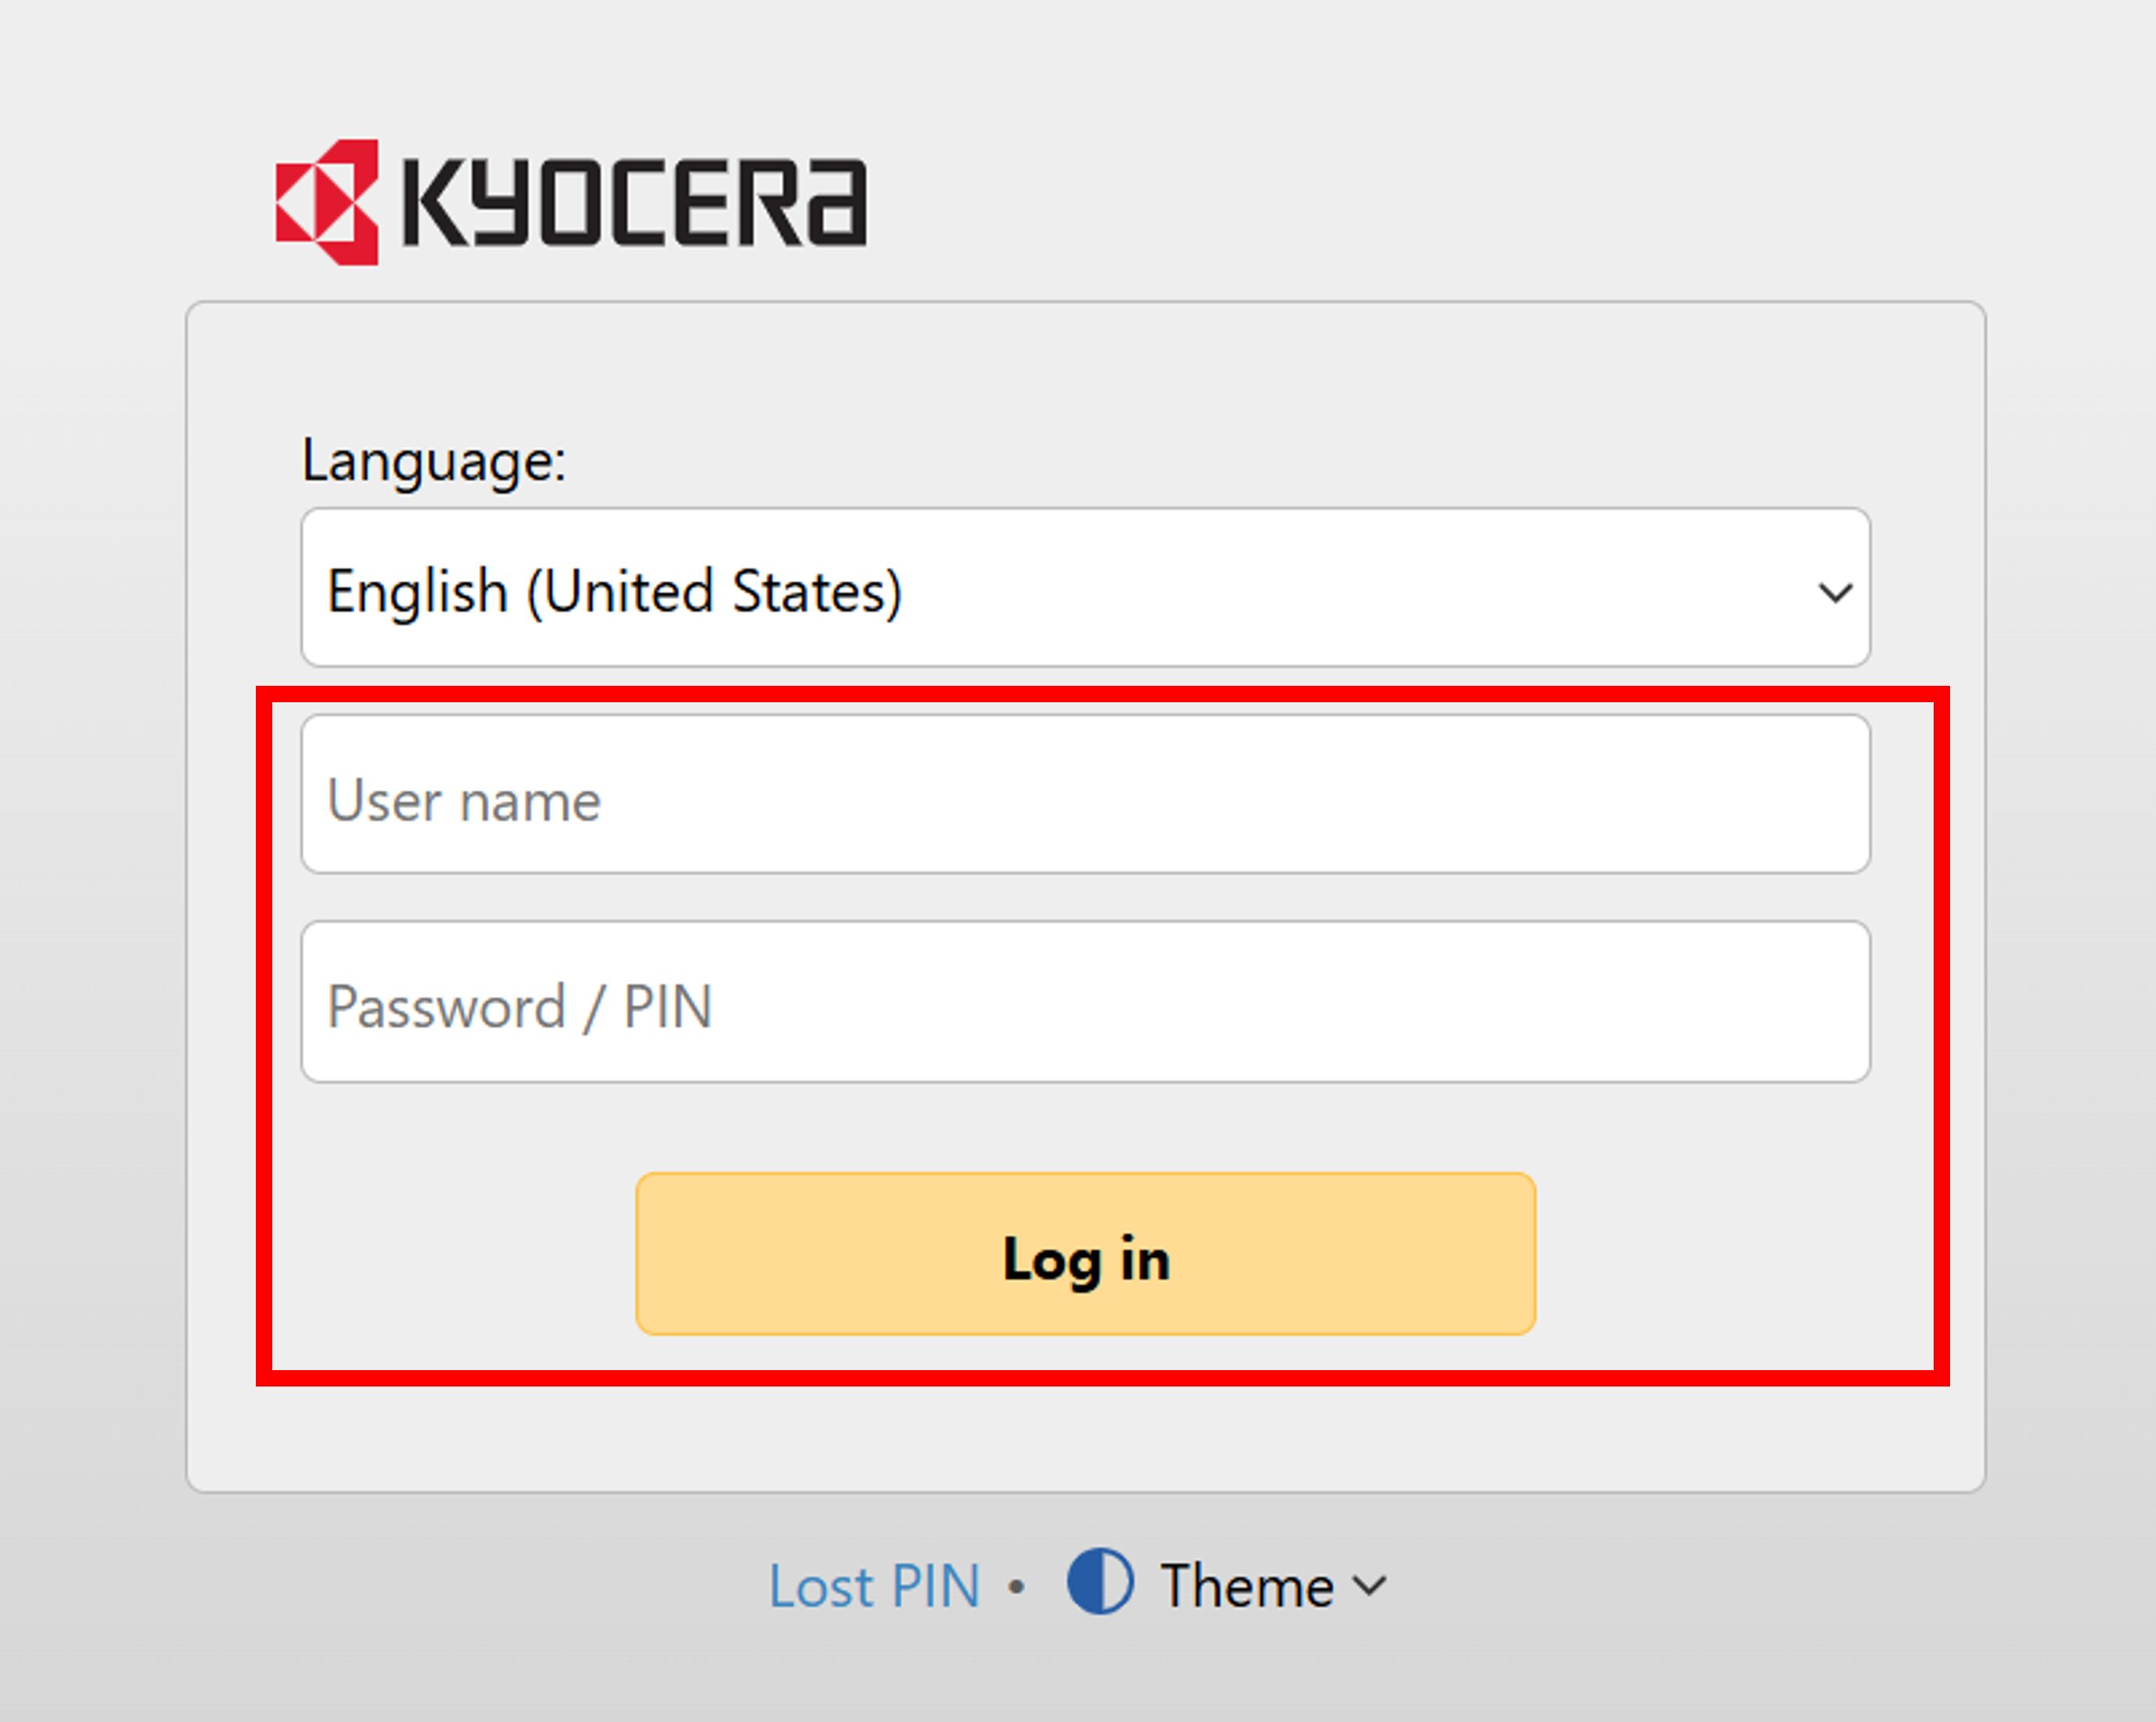
①Log In
Access to URL and login with userID and password.
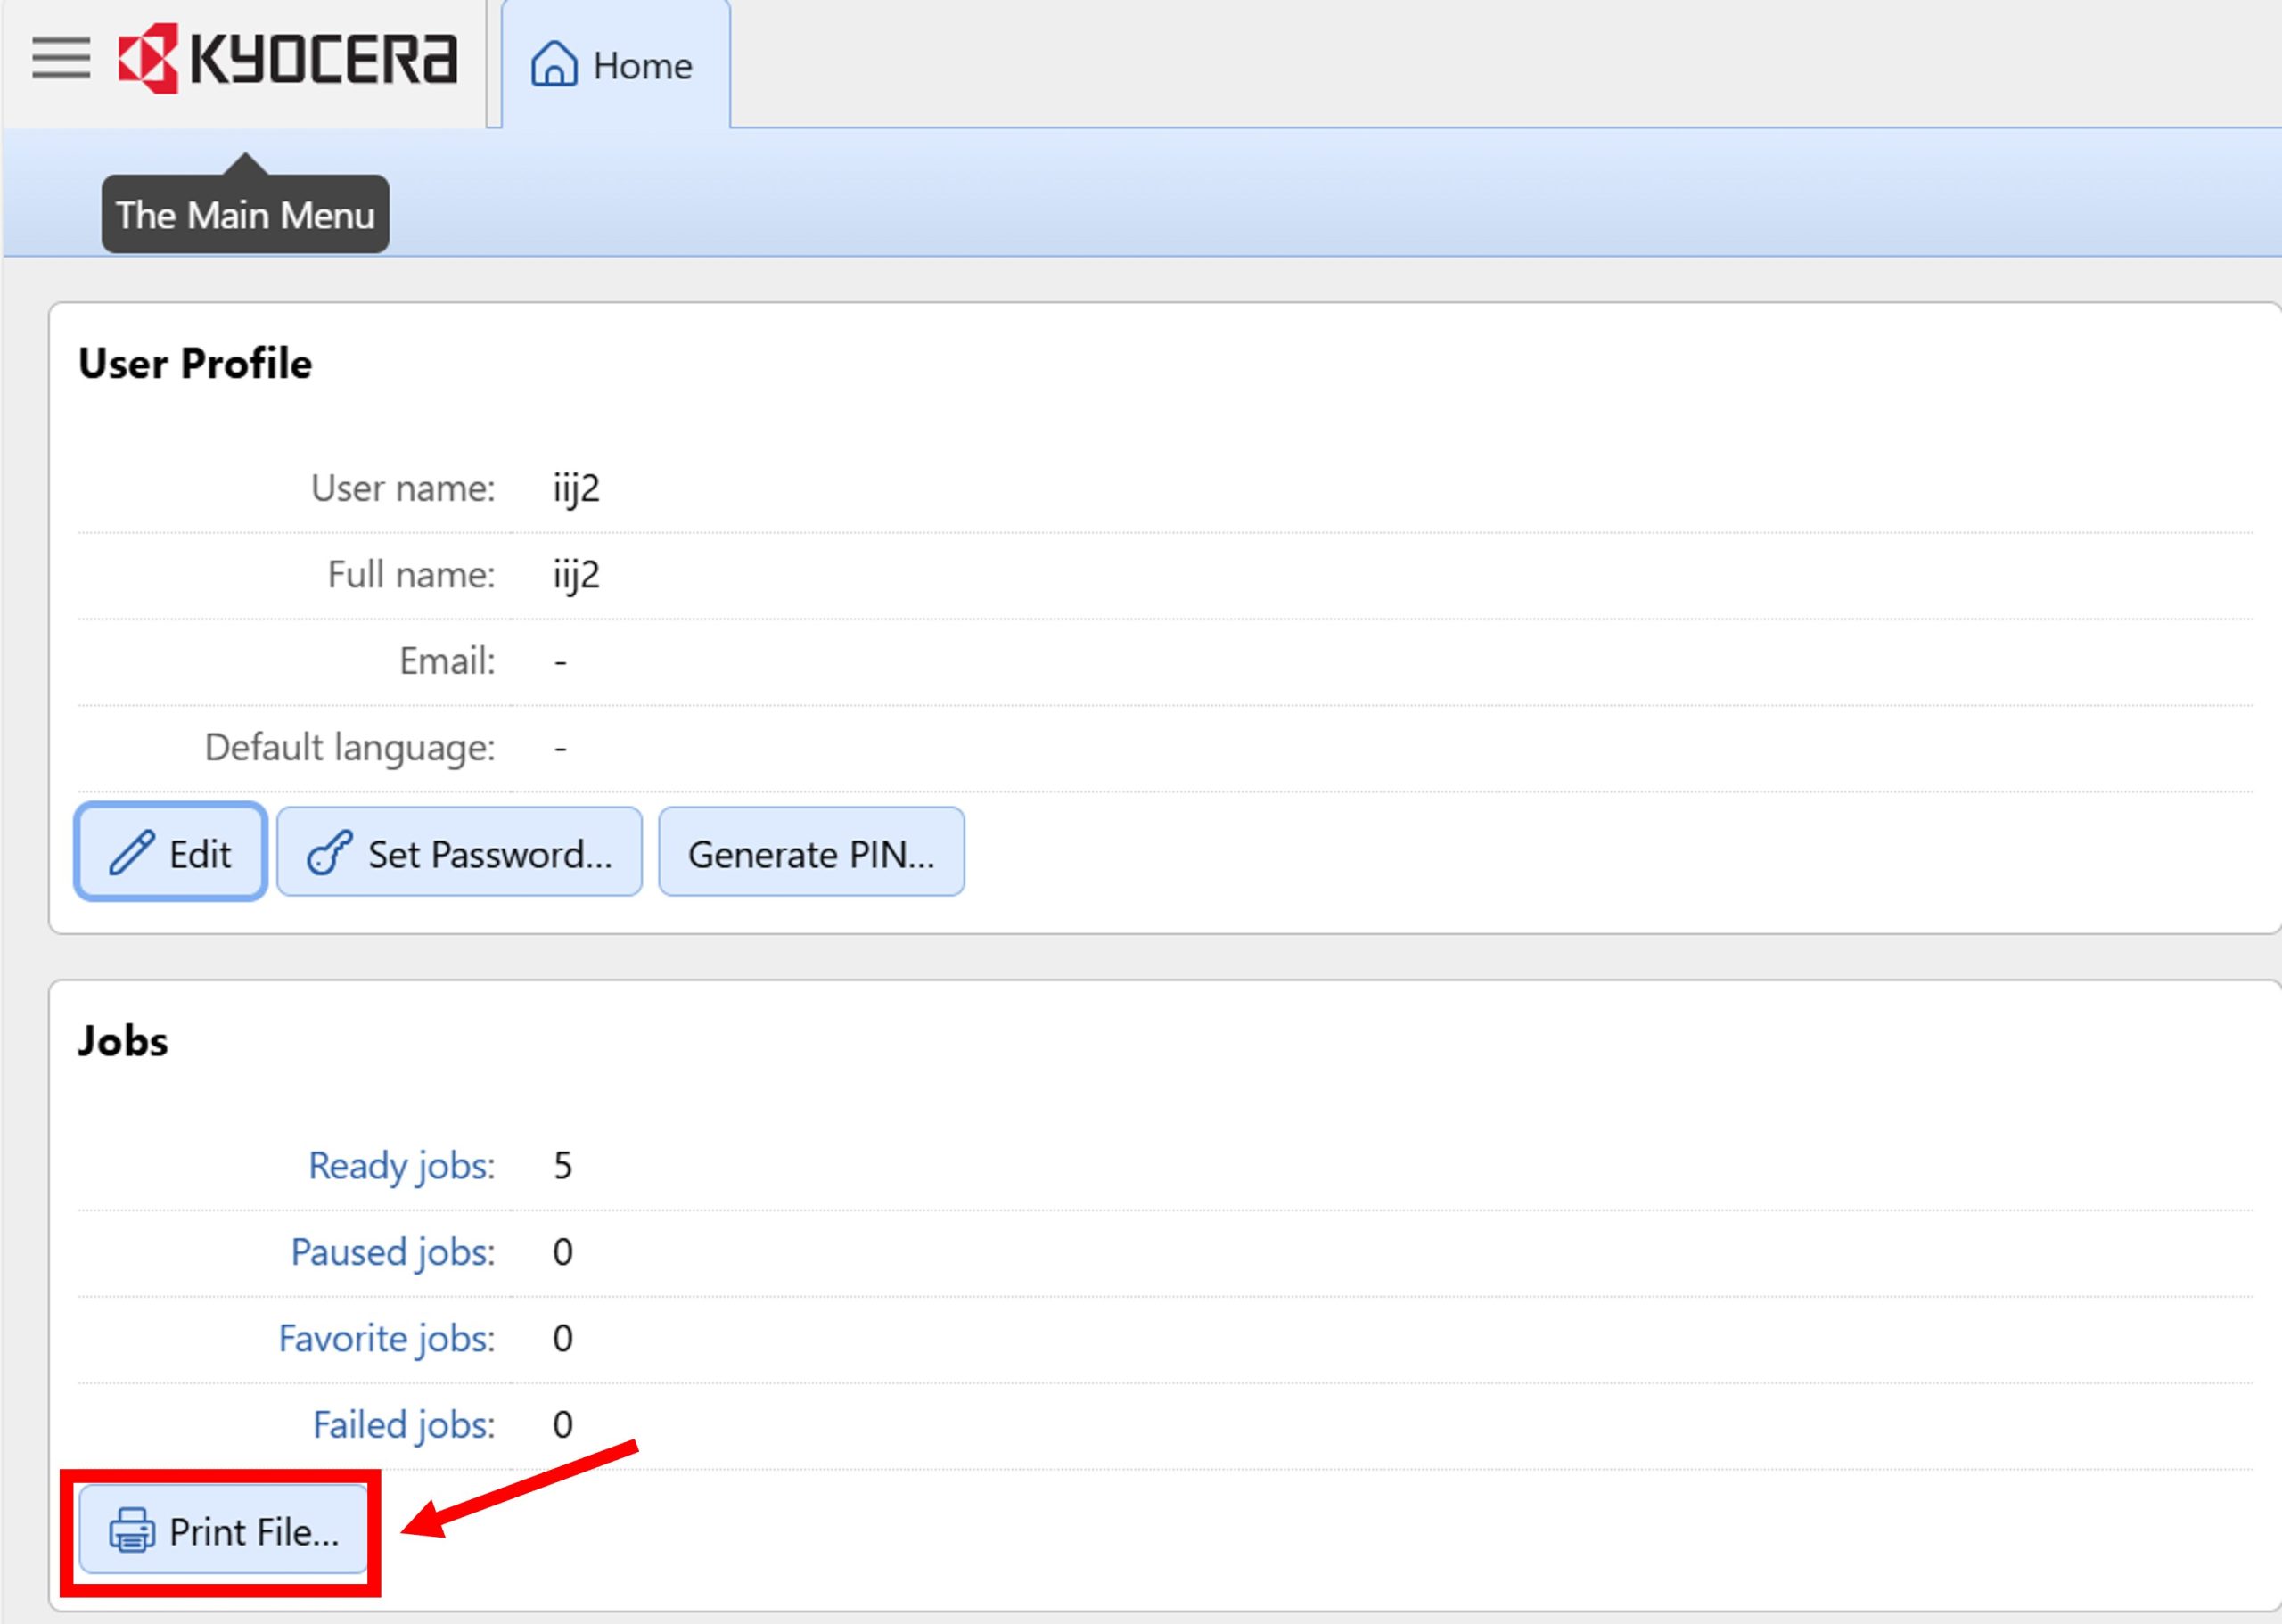
②After logging in, once you are on the User Home screen, click on “Print File”.
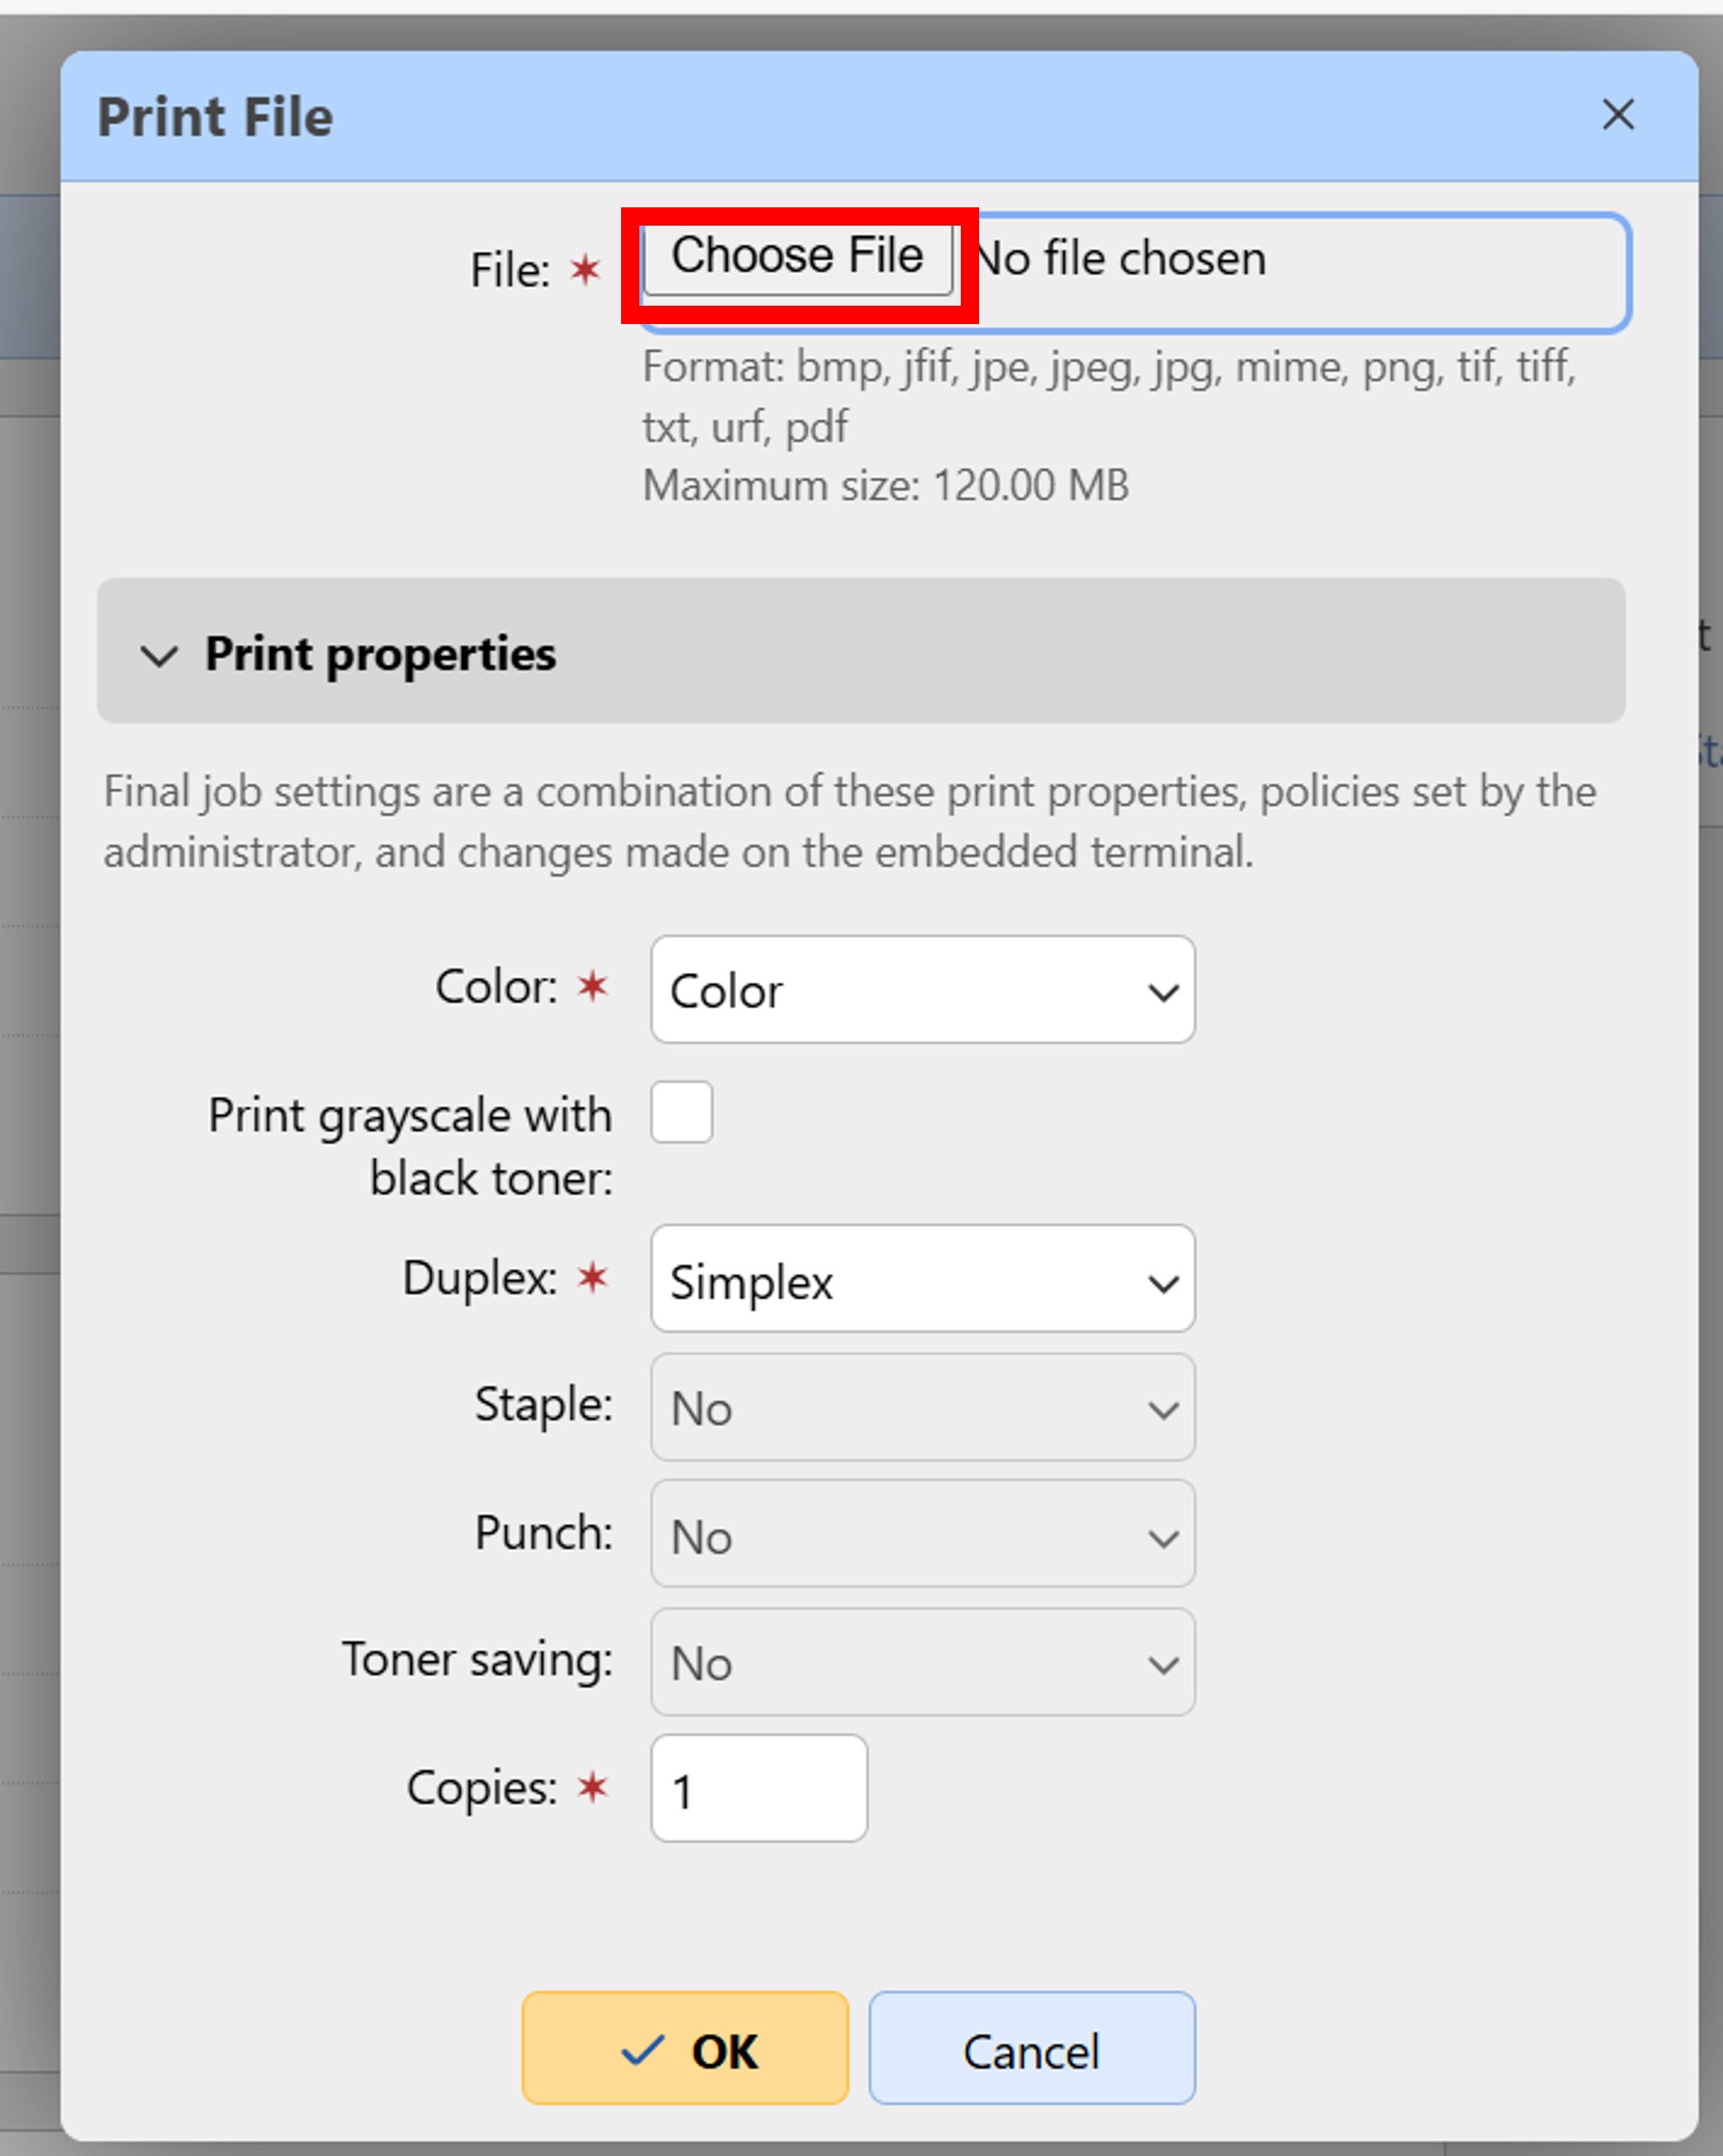
③When the print settings screen appears, click “Choose File”.
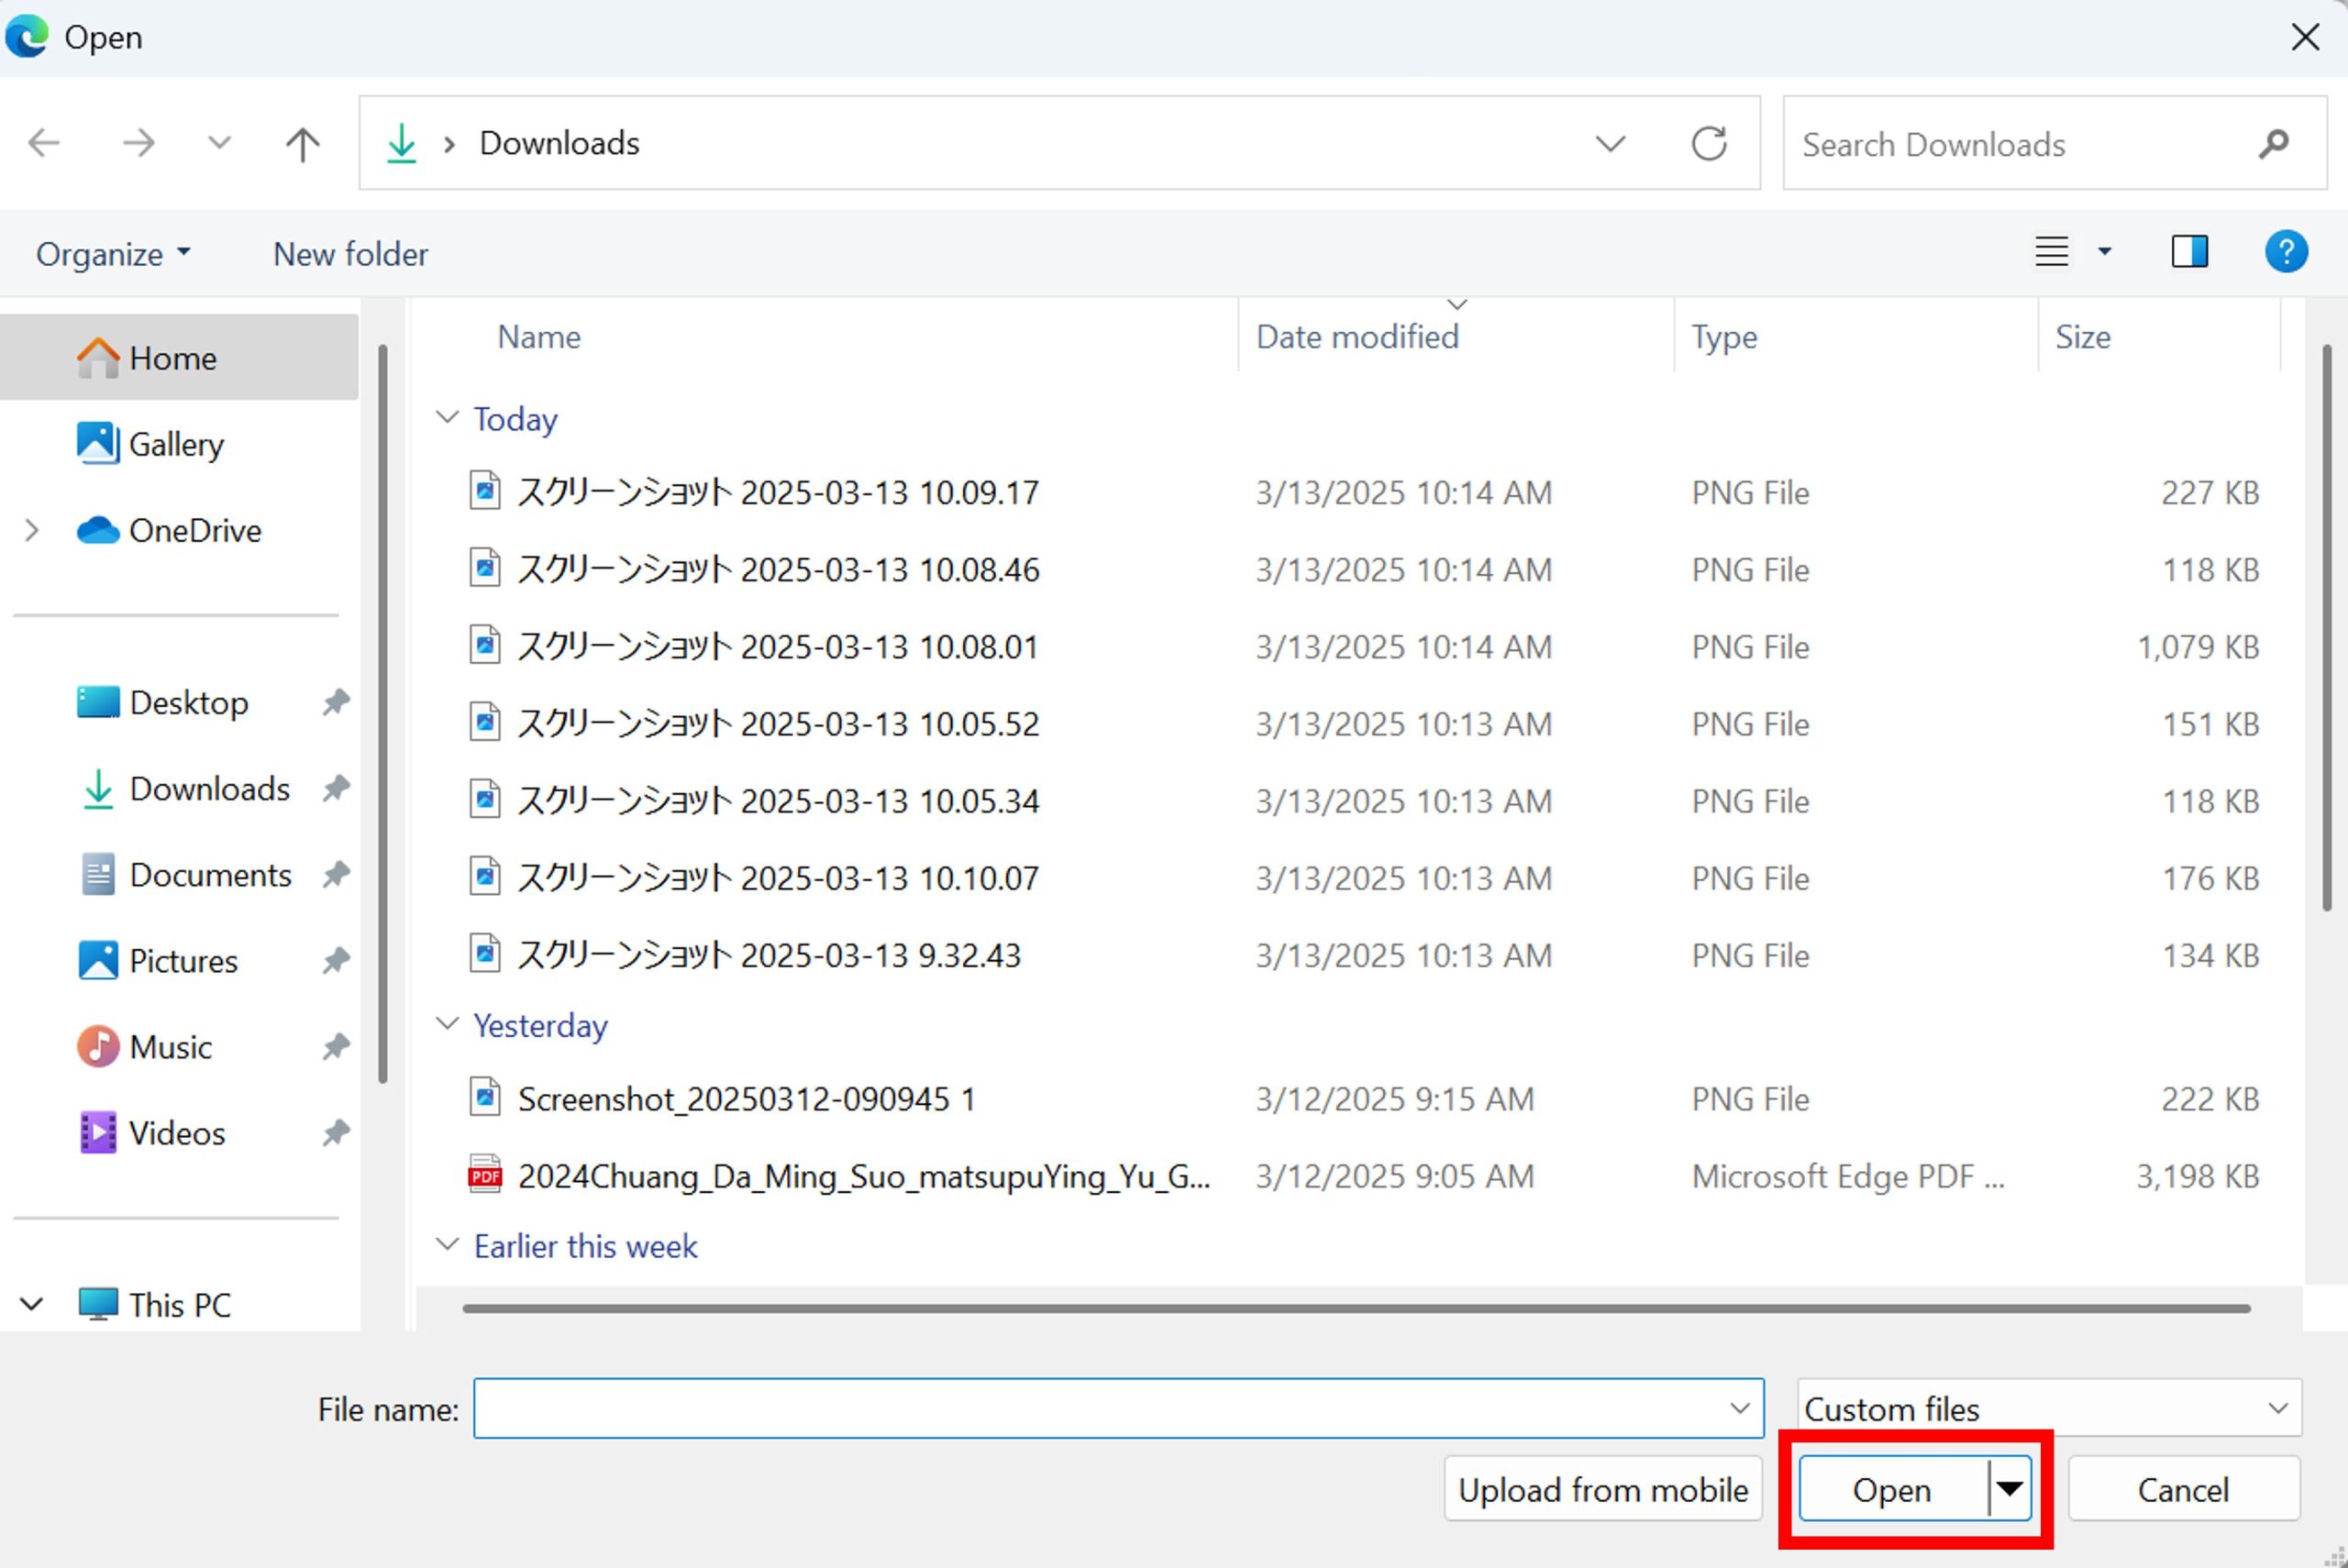
④Choose files with printing, click “open”
※Be able to print:PDF,JPEG Only
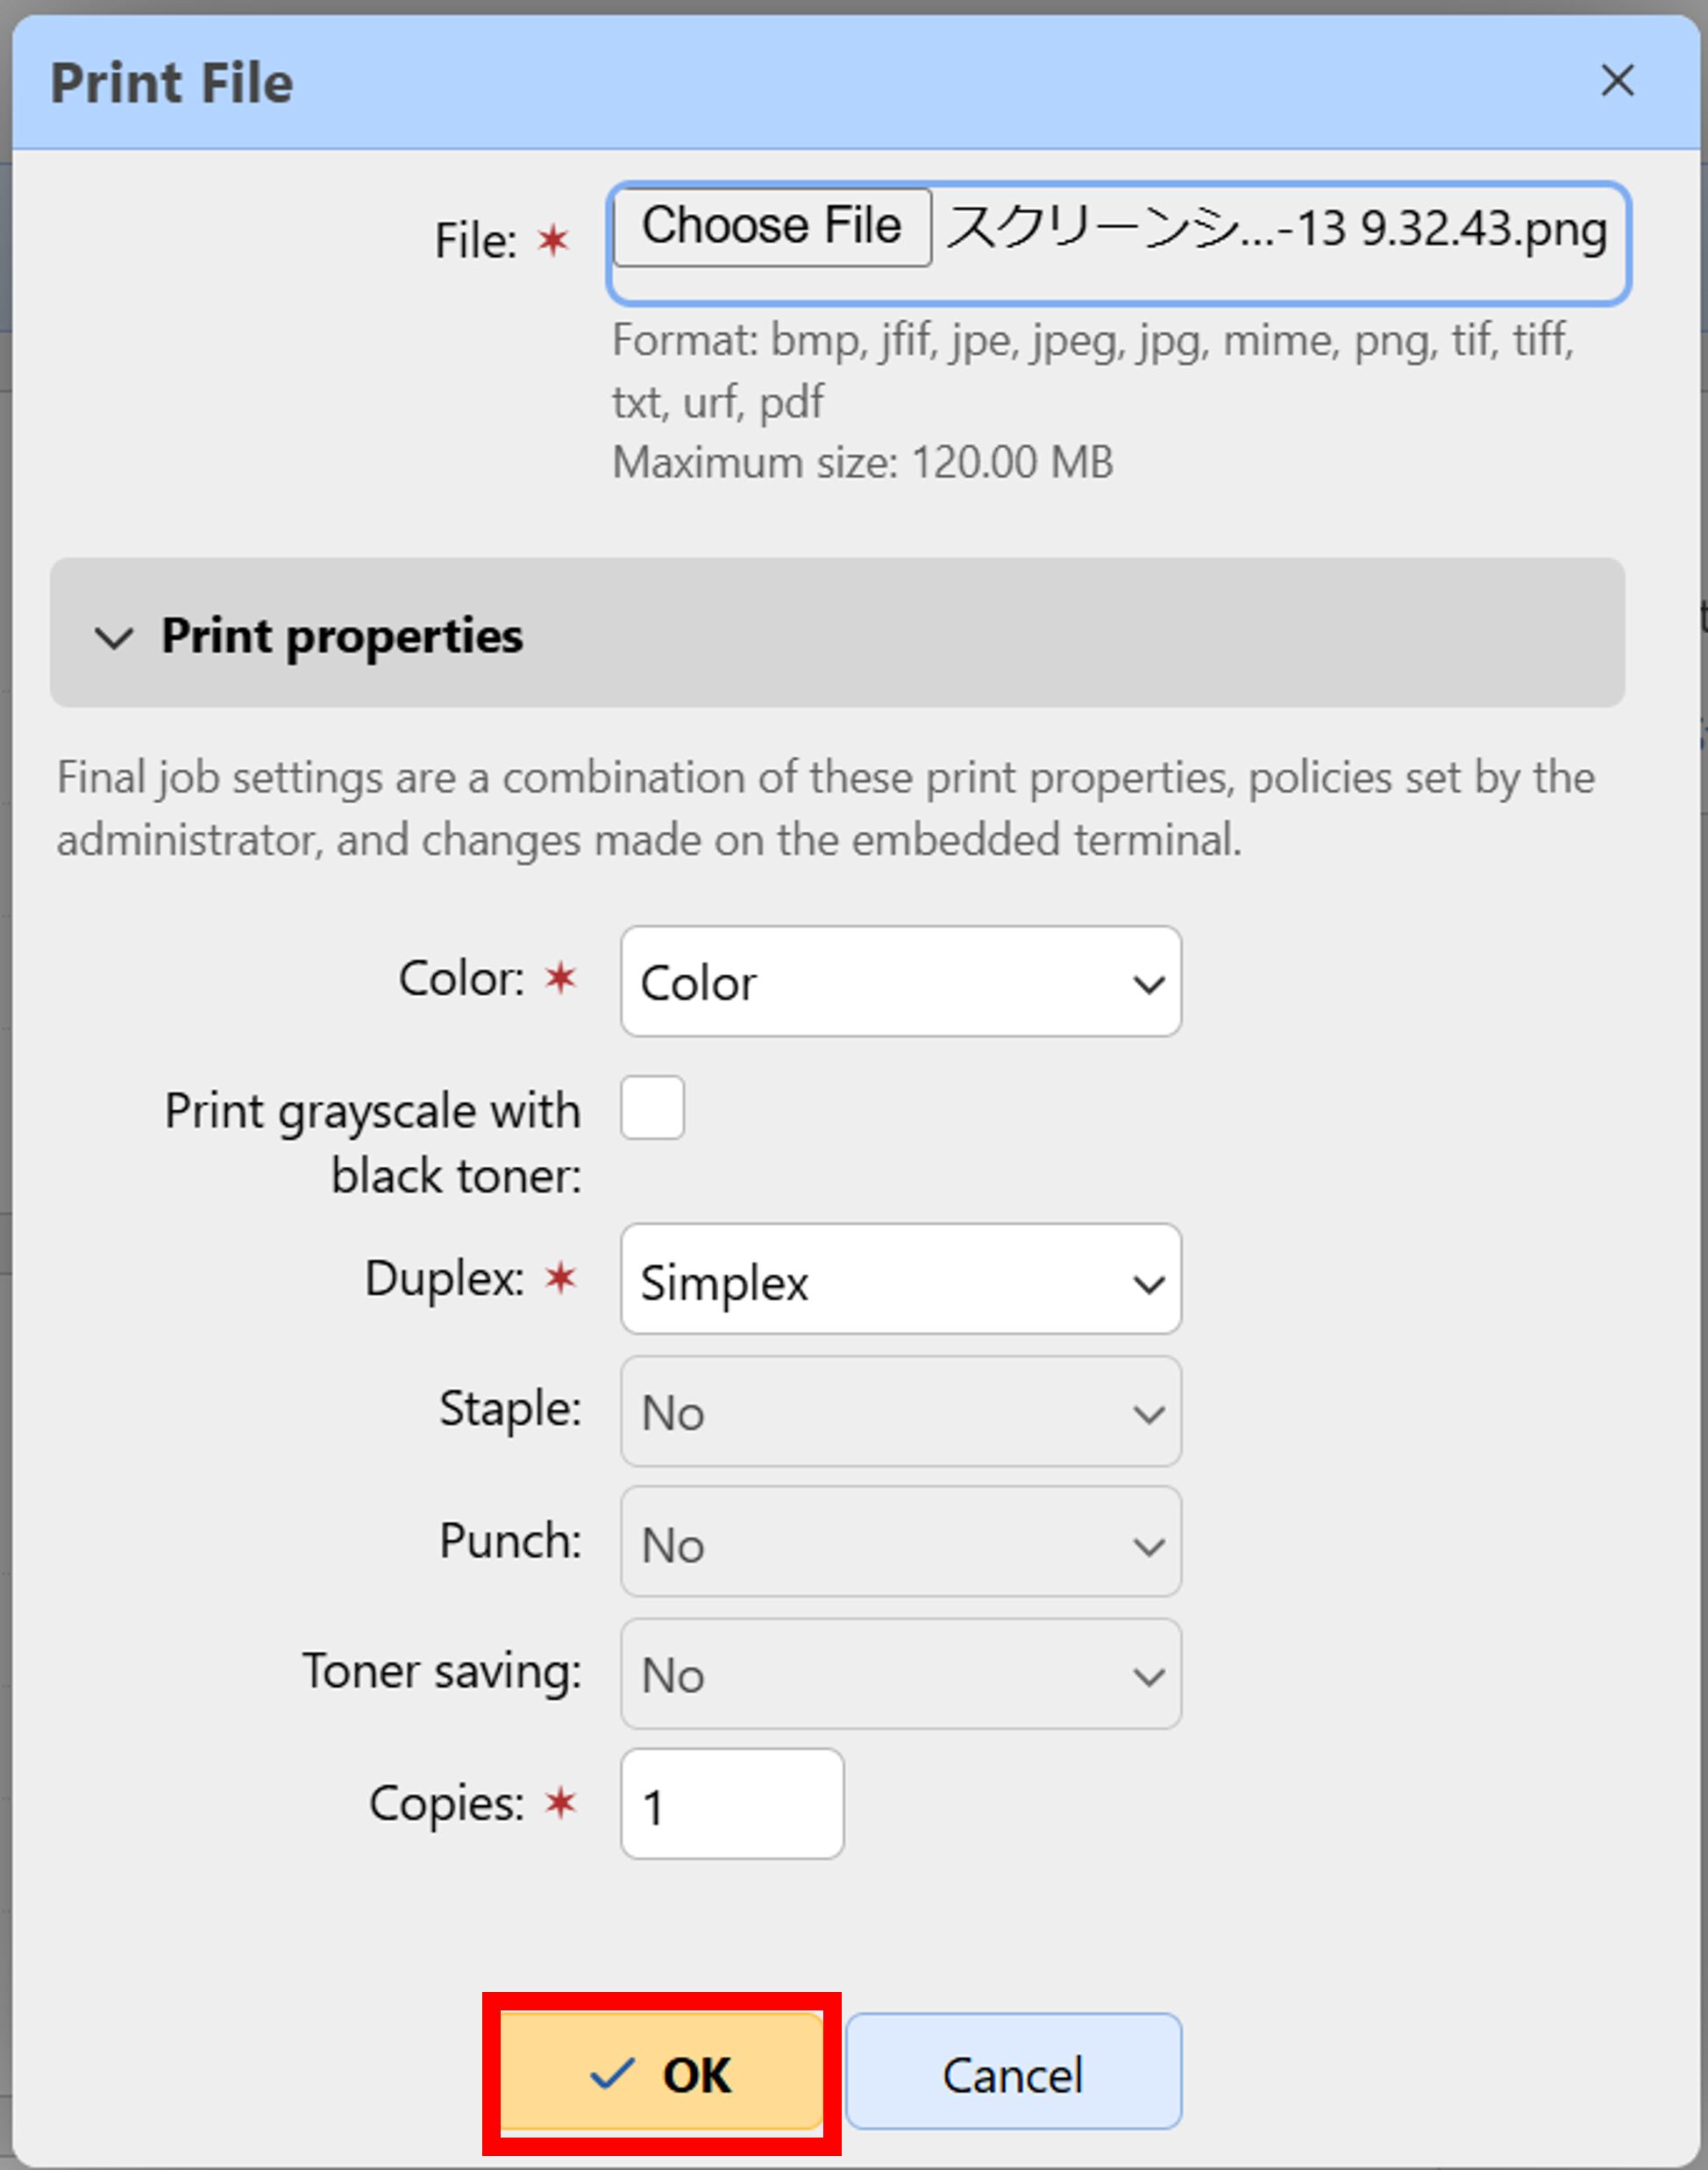
⑤When you return to the print settings screen, click the “OK”
Clicking the “OK”, the job sends to the server.
Before sending a job, simple print settings such as Black and White, double sided, number of copies, etc. can be made.
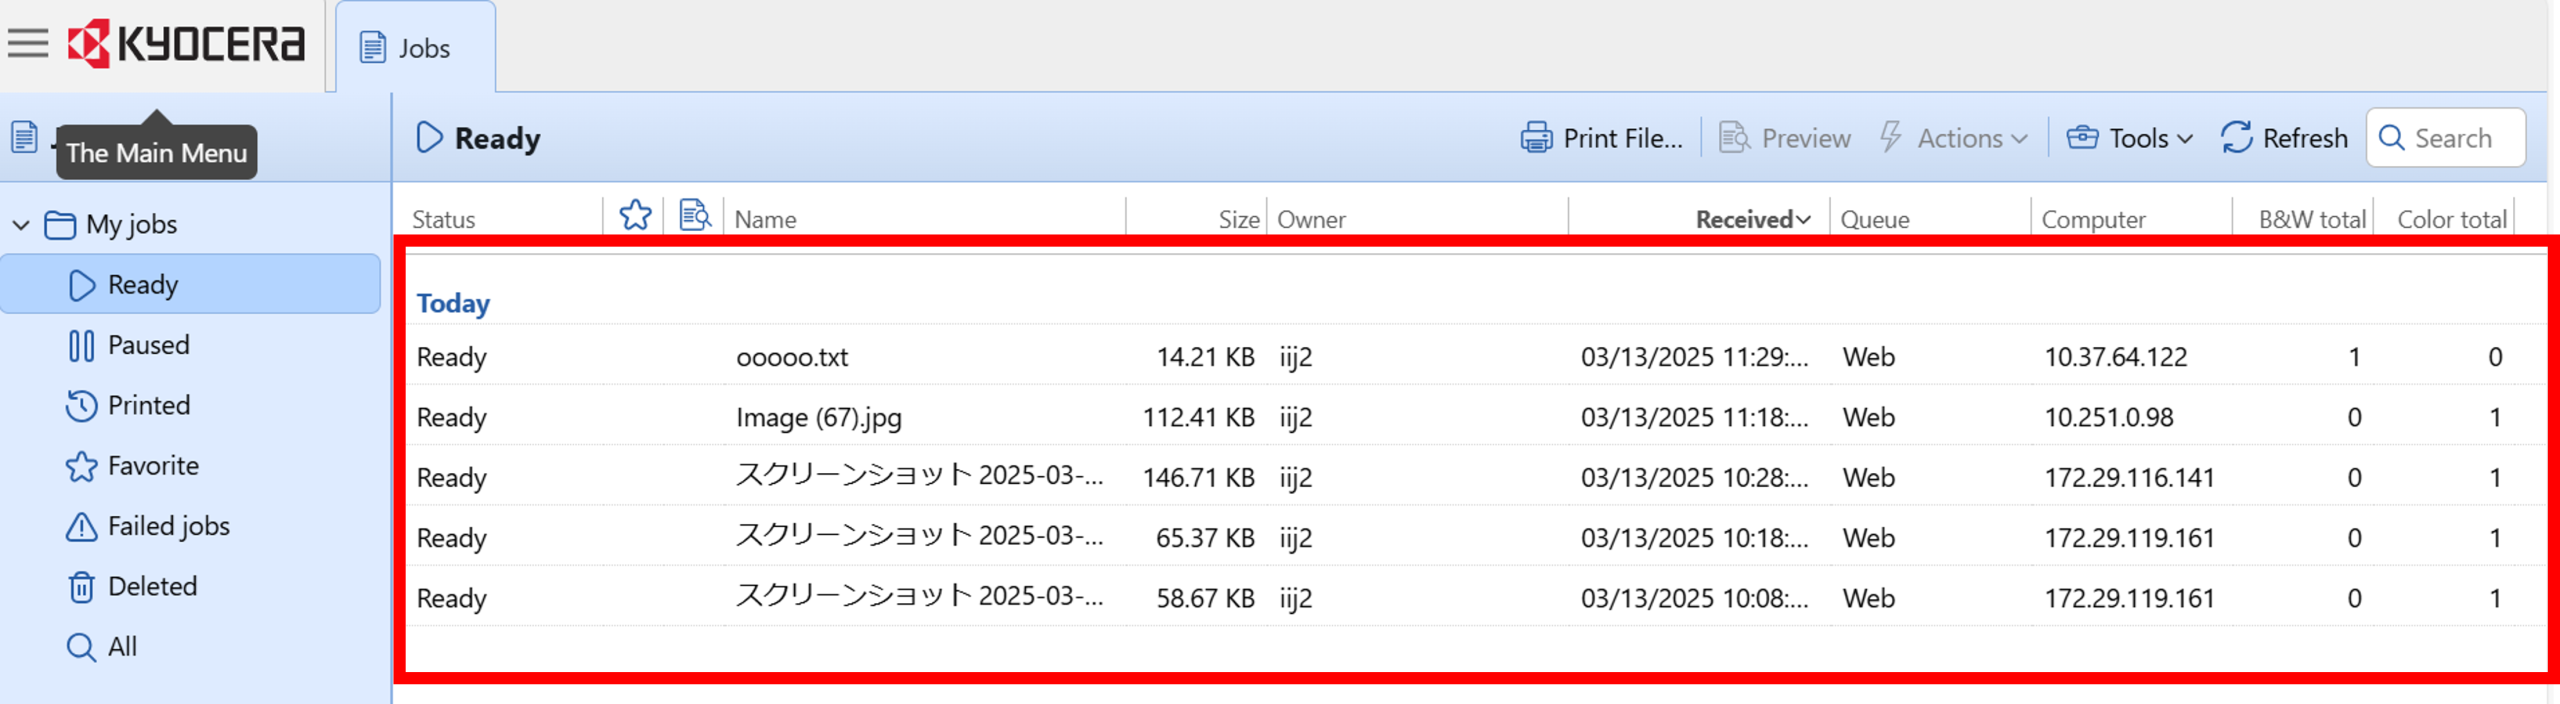
⑥Check the jobs sent to printer
After sending the job, some number shows for on Home screen > job > “Ready jobs”.
There are some jobs you add on ready.
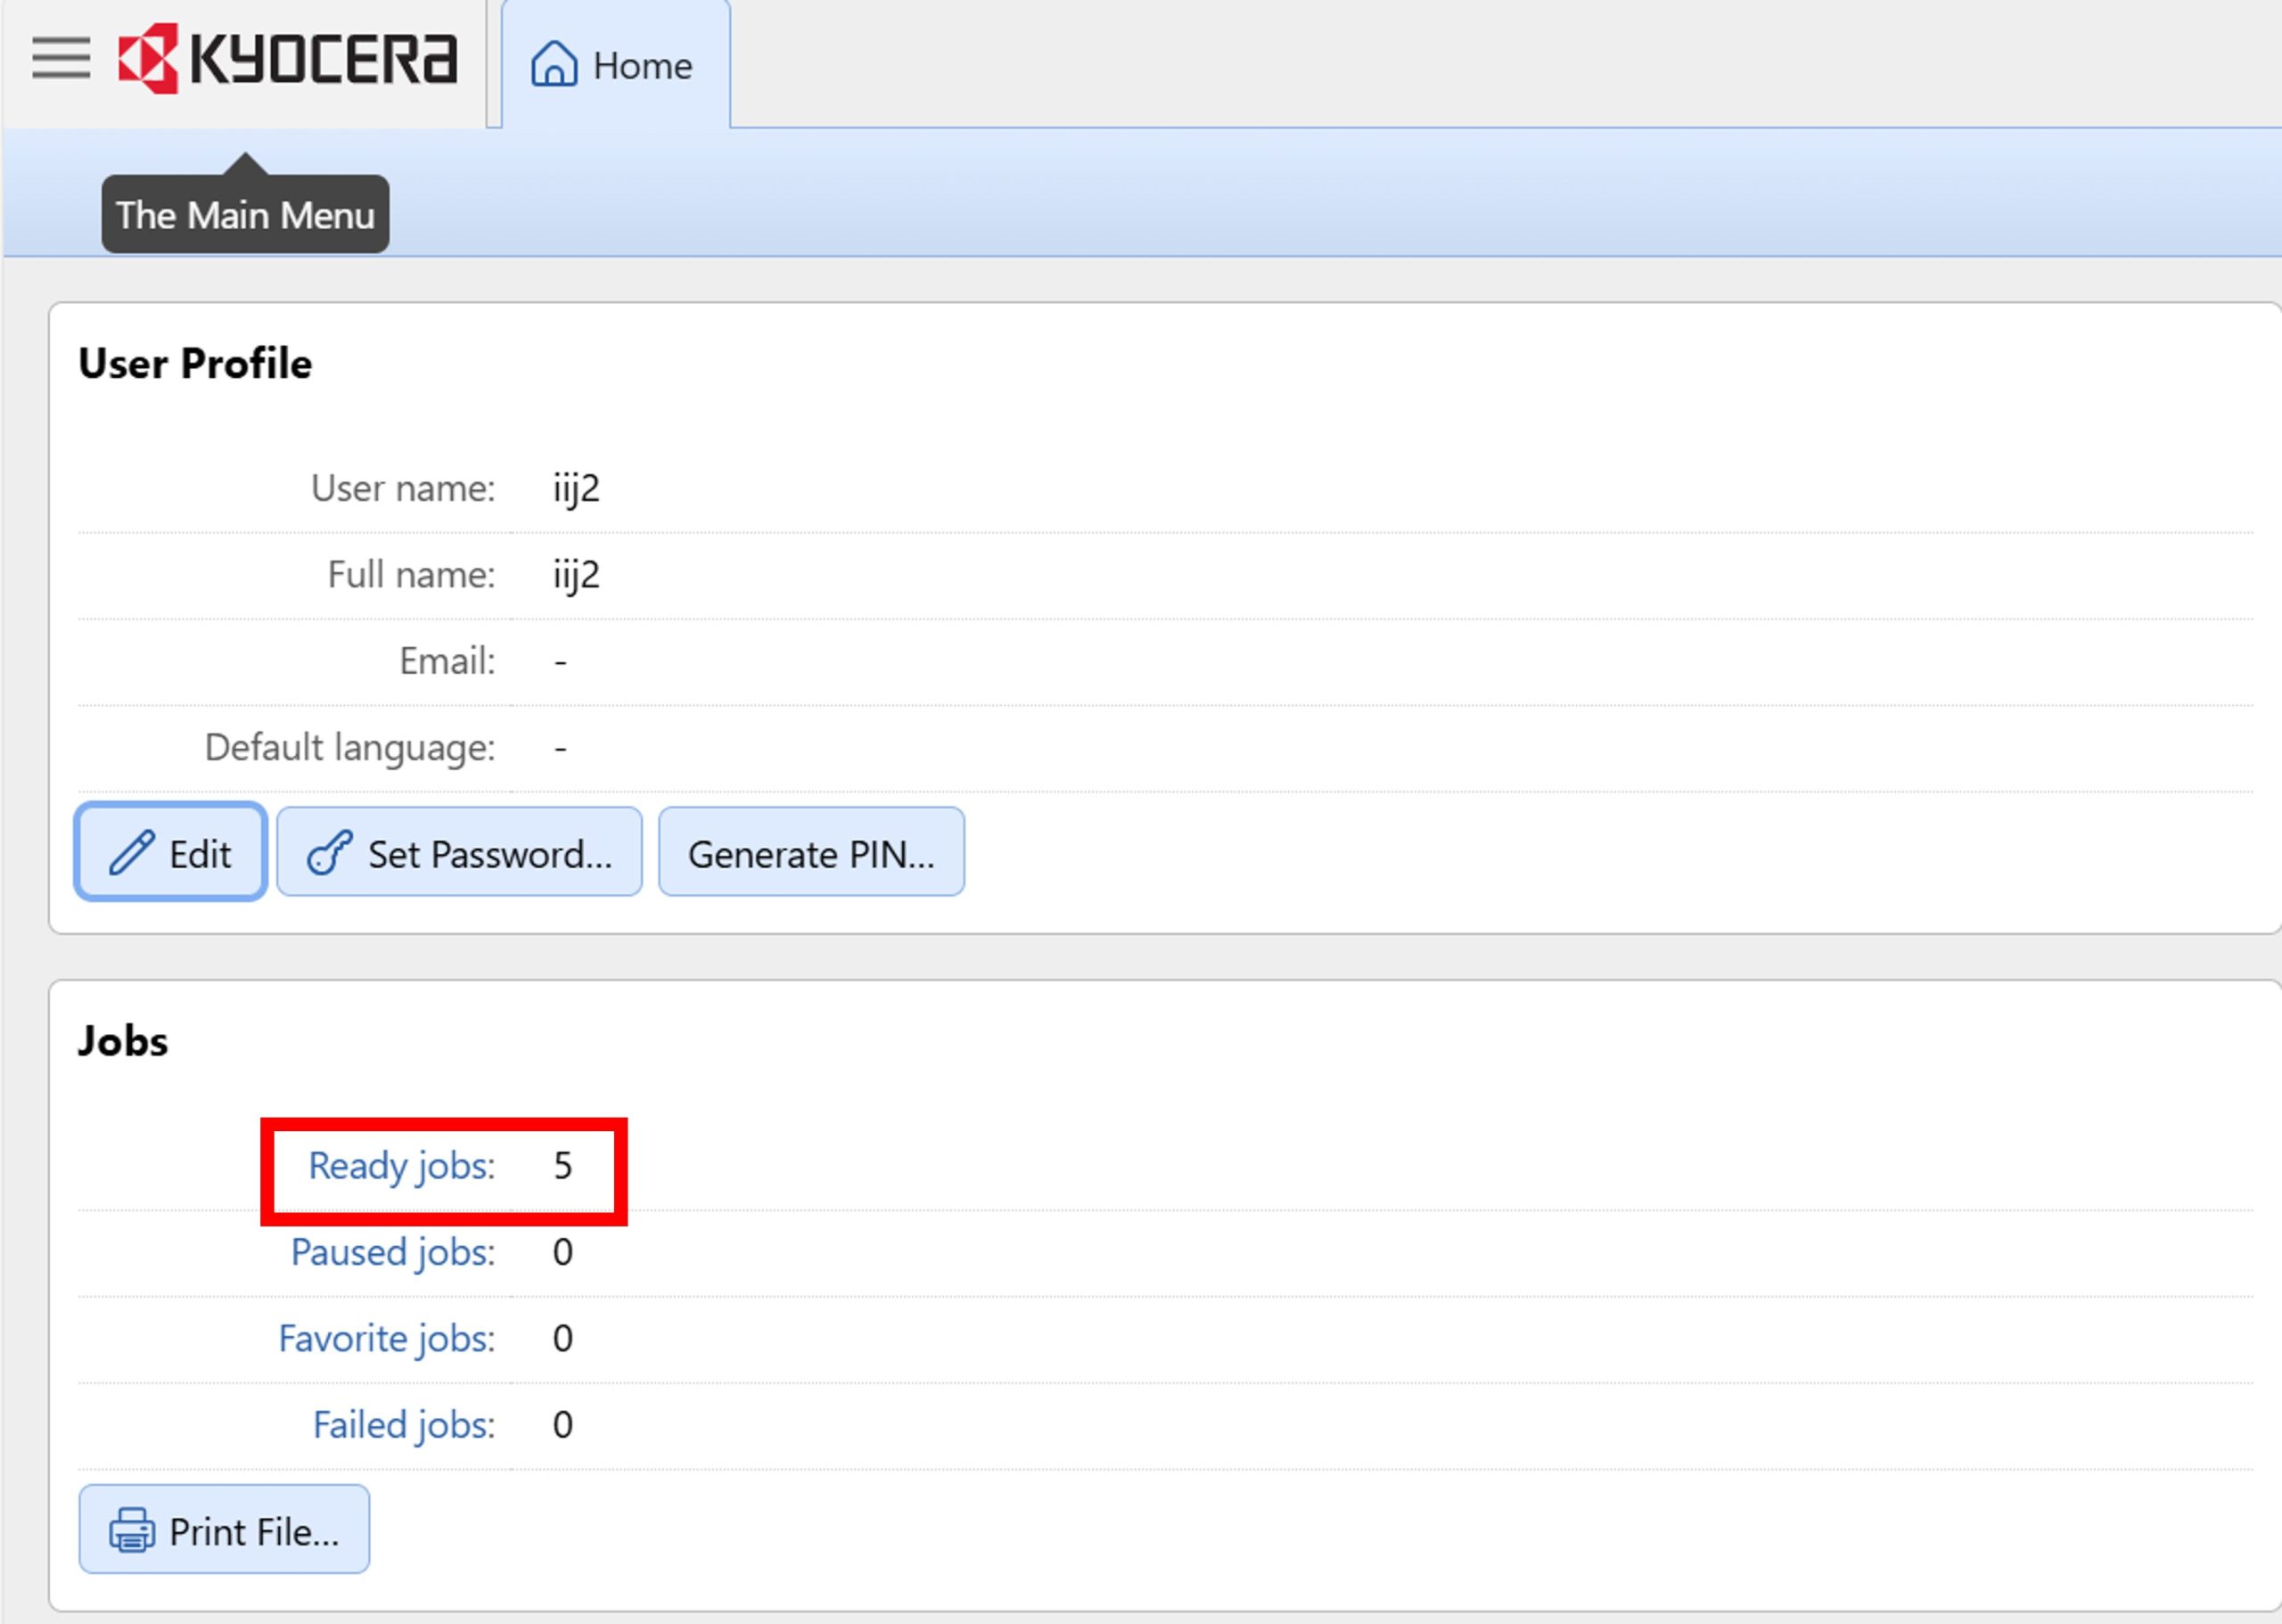
Be able to access “Job Screen” from Home screen > Quick Link > Jobs
On this screen, you can check the job history, status, and parameters of the submitted jobs.
Jobs can also be deleted.
⑦Print ※Please confirm the details from “How to use on-demand Print“
3. How to use on-demand Print (Web Print)
When you use on demand printers, printers will hold your print jobs for 12 hours. In this period, you can print whenever you’d like.
After 12 hours, printers will no longer hold your print jobs, and you have to resend them.
(1)For multifunctional machines
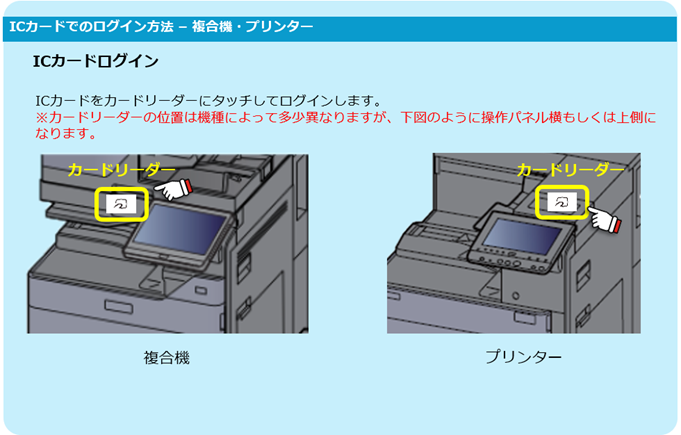
①With a printer that supports on-demand (Web Print), hold your student ID card over the IC card reader.
※Printers that are compatible with the card reader
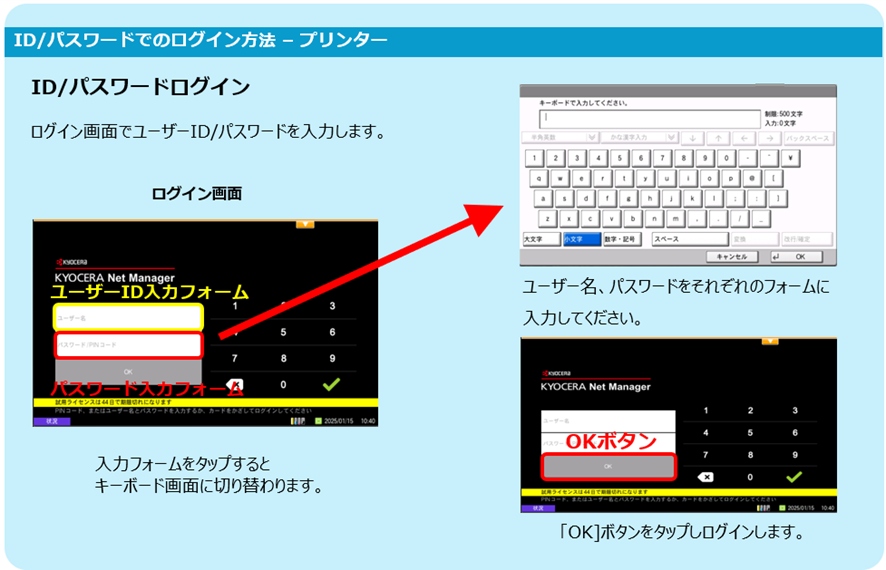
If do not have student ID card, enter the ID and password for login to PC
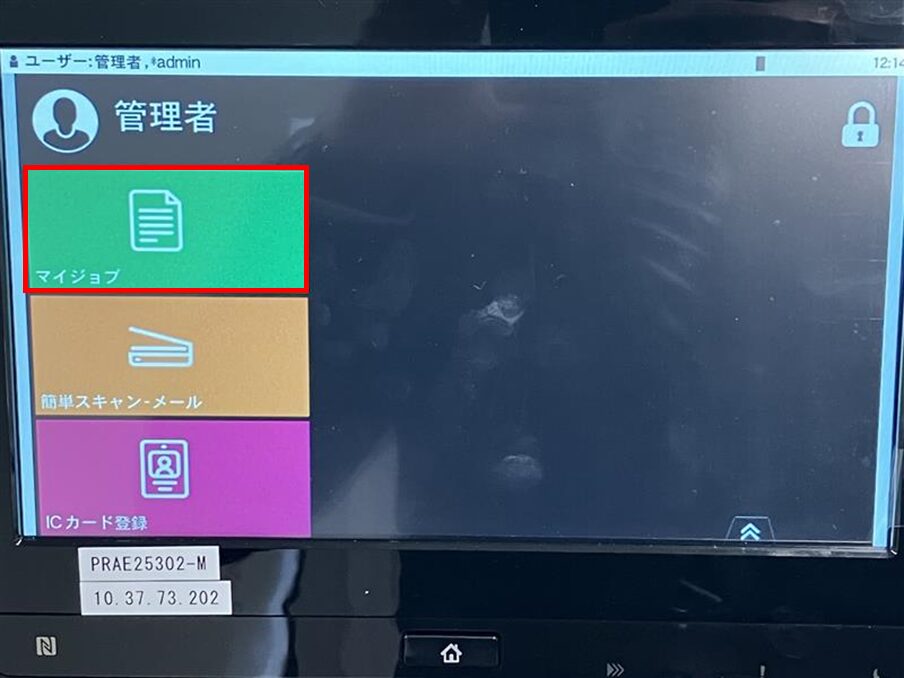
②After logging in, tap “My Jobs (Green icon)”
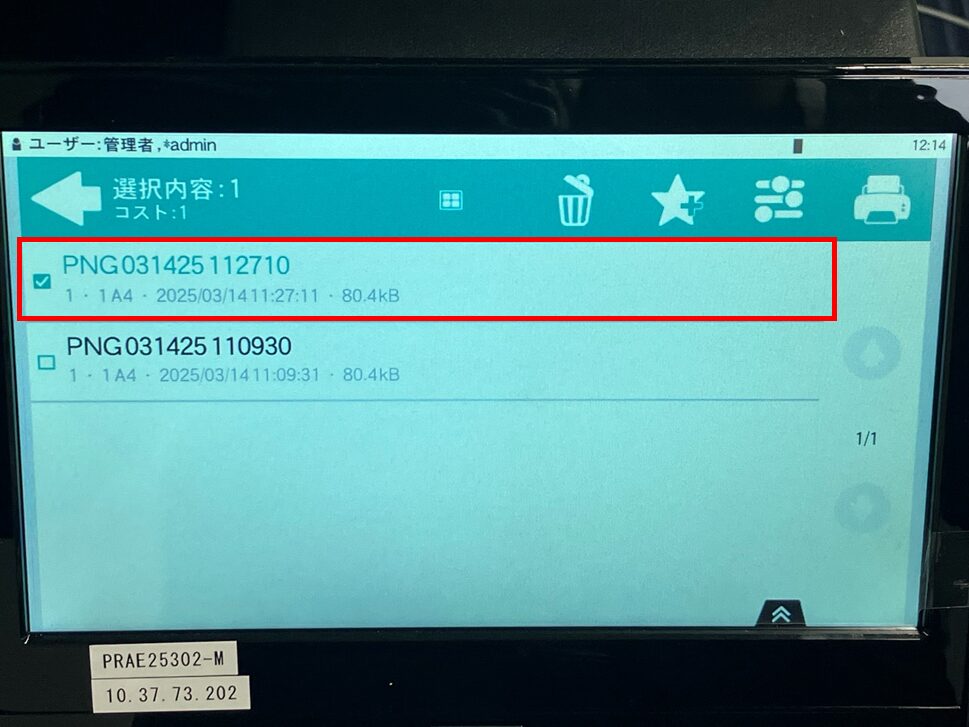
③Select jobs would like to print (Multiple selections possible)
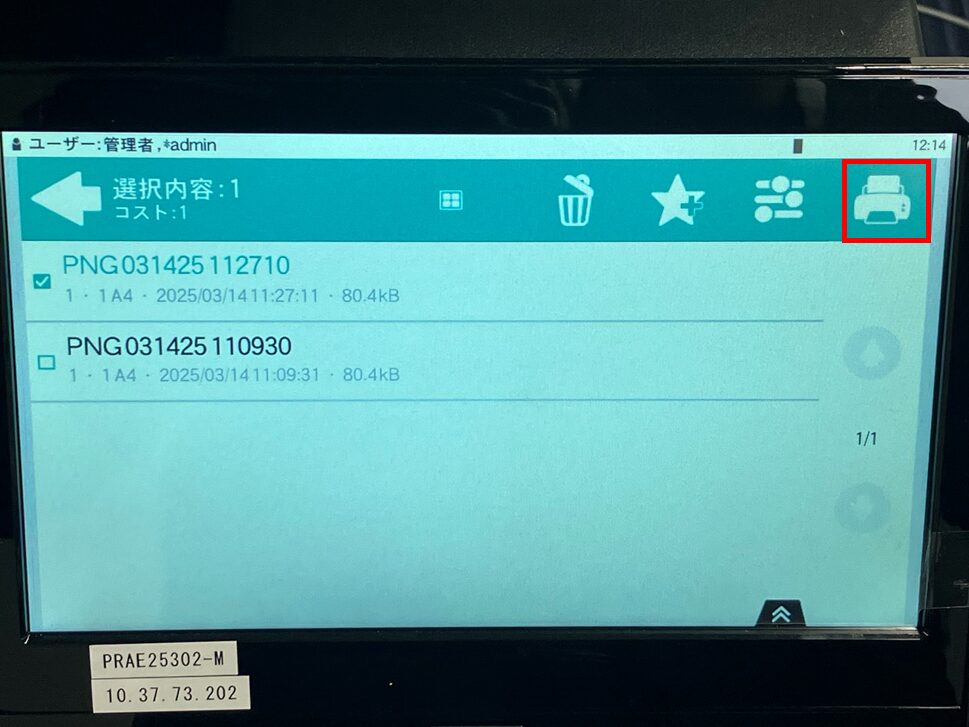
④Completed to select, tap Print mark (upper right on screen)
※On red square for below picture.
→Printed the job has selected.
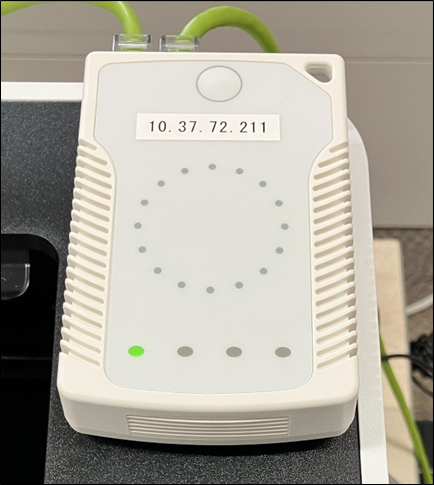
(2)non-multifunctional machines (with card reader)
hold your student ID card over the IC card reader as below picture.
※Watch Out!
The printer with a white ID reader like the one in the picture below, will print all the printing jobs you send as soon as you touch your ID on the ID reader.
Example:
You didn’t realize you mistakenly clicked “Print” twice for your 15-page-document. That means you’ve sent a printer 2 printing jobs.
Now, you come to one of the on-demand printers with a white ID reader and you touch your ID.
The printer prints 30 pages and the credits worth 30 pages are deducted from your account.